Showing posts with label system and processes. Show all posts

Monday, 18 January 2010

SYSTEMS & PROCESSESS - STUDIO PHOTOGRAPHY 2 pear


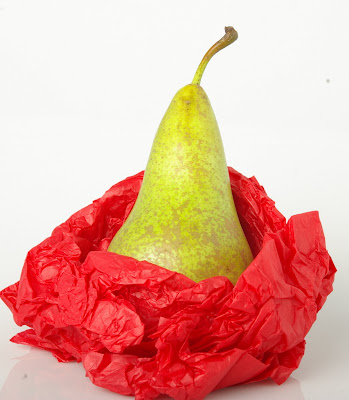
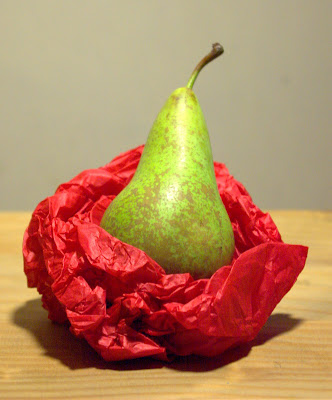
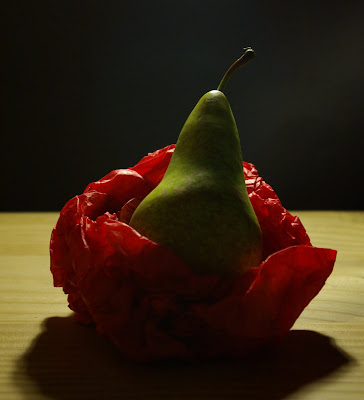
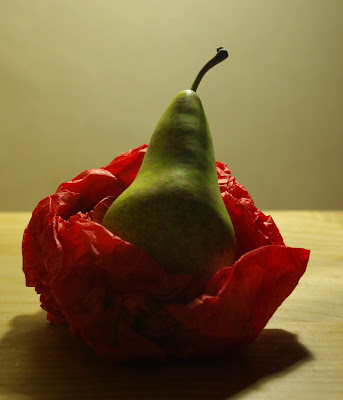
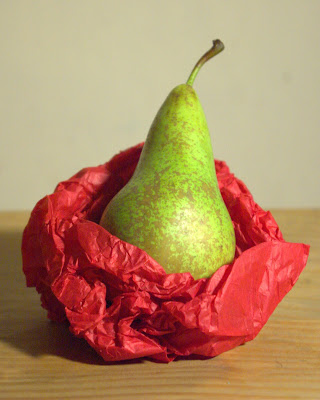
after trying out several fruits in the studio i settled on using a pear, i also researched the lighting techniques, both of which can be found on my blog posts. This is my final peice for the studio photography no2.

high key- very few shadows with not much contrast.

low key- quite dark but with beams of light shining on object to show form and colour.

45/45 - light to the right of the fruit at at 45 degree angle and above at a 45 degree angle casting a shadow as seen in image above.

back lit - creating a halo effect around object being lit.
top lit - quite bright with only a shadow aroun the bottom of the object
high key
top lit
low key

back lit


45/45

SYSTEMS & PROCESSES - CAMERA/LENS TECHNIQUES 4

for the forth part of camera/lens techniques we were asked to use fast and slow shutter speeds to freeze action or get the effect of motion blur

for my pictures i decided to go to the motorway bridge i knew here i'd be able to use both fast and slow shutter speeds to show the effects desired.
as you can see the two images above have been taken on a slow shutter speed and this has caused them motion blur


althought these to images are quite dark they have been taken on a fast shutter speed and show no sign of motion blur and there for give the impression of stillness with no movement.


SYSTEMS & PROCESSES 1- LOCATION PHOTOGRAPHY

for the first part of the location photography we were asked to find and photograph an object lit by the following light sources:
  • fluorescent
  • incandescent
  • sodium
  • halogen/tungsten

this lighting is incandescent and was taken using a household bulb for lighting as you can see there is a slight orange tint (warm) to this colour of lighing
this light is taken with the same source of light as above but with my camera i have changed the white balance setting, which corrects the lighting and takes away the orange light.

fluorescent light, quite a white light with a cool feel to it.

sodium lighting is a very orange colour


halogen/tungsten lighting in conparison to the fluorescent i thought they'd be very similar which they are but the halogen has a slightly warmer tone to it more 'cream'

Tuesday, 12 January 2010

CAMERA/LENS TECHNIQUE - DROP FOCUS TECHNIQUE


DROP FOCUS TECHNIQUE

drop focus technique is usually taken with a large format camera where the lens can be tilted to get the desired effect, here its been taken with a DSLR and from an oblique angle to achieve the same effect. with drop focus there is also just a small band of focus which normally lies on the object where you eye would naturally fall.
this is my example of the technique.


for the picture i used studio lighting which was continuous light and a small LED torch light to create a slightly cold winter feeling to it. I edited it in Photoshop to make the colours more vivid and also put a candle flame on to it as the original image was not lit.
below is the original unedited image along with the image where i got the candle flame from.


this is the image which i took the candle flame from.
the image temp was warm up to maximum as initially it was a white candle, this was done to achieve the red glow in the flame.


this is the original image which later has had the temp increased in Lightroom from 3900 to 7500 and the light fill increased from 0 to 34.


cAMERA/LENS TECHNIQUE - DEEP DEPTH OF FIELD

Depth of field (DOF) refers to how much of a photo is sharp in front and back of where you focus on the main subject. DOF is primarily controlled by aperture size though other factors come into play such as the focal length of the lens and the distance the background is from the subject.In some cases, it may be desirable to have the entire image sharp, and a large DOF is appropriate which means that all or most of the picture is in focus from front to back. It is often used for capturing subjects in the distance, such as in landscape scenes.

The further away your camera is from the subject, the greater the depth of field. Higher f-stop number is used to produce deep depth of field.


CAMERA/LENS TECHNIQUE -SHALLOW DEPTH OF FIELD


What is Depth of Field?

Depth of Field or DOF for short is a description of how much of your photograph is in focus. A shallow depth of field simply means that one specific area of your photo is sharp while other elements remain blurred.
One of the greatest uses of DOF is to single out your subject while at the same time reducing the effect of distracting background clutter. This can be used in almost any style of photography, portraits, sports, photojournalism, close-up and macro all use shallow DOF extensively.
The basic formula for shallow Depth of Field is to get as small of an f-stop setting as you can reasonably get away with in your photo. The smaller the f-stop, the larger the aperture. The aperture basically works the same way your pupils do, the more dilated it is, the more background is blurred. A good technique for getting shallow DOF is to start with the smallest f-stop your lens will allow. 2.8 or better works well for this style.
One important aspect can be uses of blurred or surrealistic imagery. With a good quality lens and an eye for the art in nature you can truly find ways to distort reality and bring your mind's eye into the photograph.


Some examples of shallow depth of field


My examples of a shallow depth of field


Monday, 11 January 2010

DIGITAL DARKROOM 1 & 2 - ORGANISING & IMPORTING


Here's a demonstration of importing, organizing and naming files/folders


this is a screen capture of me uploading my images


this is a capture of all the images once loaded and down the left hand side there is a list of all the catalogs and file numbers.


this screen capture shows were captions can be made (down the right-hand side).

Friday, 27 November 2009

SYSTEMS & PROCESSES - CAMERA/LENS TECHNIQUES 3

ASSIGNMENT BRIEF


CAMERA/LENS TECHNIQUES

  • Use both wide and telephoto lenses (or focal lengths) to make 2 photographs of the same subject

below are my to images using wide and telephoto focal lengths

to achieve telephoto focal lenght image a long focal length lens with shorter back focus is used allowing it to be relatively compact image.


to achieve a wide focal length image a short focal length lens of extreme covering power is used to give a wide angle of view.

as you can see from the images above the first picture is quite compact and the second allows you to see alot more of the surroundings.


STUDIO PHOTOGRAPHY - Bottle

ASSIGNMENT BRIEF

STUDIO PHOTOGRAPHY


Using a bottle of water (preferably a coloured bottle), employ the use of the following modifiers;

  • honeycomb

  • soft-box (masked),

  • beauty dish

  • umbrella.

these are the pictures i took using the above modifiers, i also used black boards and white reflectors to change the effects slightly.


modifier: soft box with masking (low down)


modifier: soft box masked with back light


modifier: soft box, with masking (high light)


modifier: umbrella


modifier: umbrella with 2 side detractors


modifier: umbrella, with back light on


modifier: beauty dish


modifier: beauty dish, with black detractor at the side and white reflector above to lighten the lid.


modifier: honeycomb


modifier: honeycomb


modifier: honeycomb with white reflector to right

from this task I've learnt that using soft box with masked lighting is what seemed to work best for the effect i was trying to achieve which was to get a line of light down the bottle. i found that the honeycomb modifier didn't show enough light on the bottle and was confined to one spot around the centre and the beauty dish and umbrella light which was quite thick and only down half the bottle. If i was to do this again i would use the soft box with masked lighting and have it down both sides to create a more even look and to represent the "curves" of a woman as this is a product that is aimed at women.

Thursday, 26 November 2009

STUDIO PHOTOGRAPHY 2 (reject)

For part of the assignment we were asked to take a picture of a pear and employ the following lighting techniques.
  • 45/45
  • high key
  • low key
  • back light
  • top light
EQUIPMENT USED

  • Bowen's Esprite 2500 watt strobe light (on stand)
  • Honeycomb diffuser power setting on 4
  • Hot shoe for flash
  • Light meter (used to find out aperture)
  • Mini product table
  • Tripod

When taking my pictures i decided to use a tripod so i could have the fruit in the same place and just move the lighting this way it was easier to see the effect the different lighting techniques had on the product and picture.

LOW KEY

TOP LIGHT

BACK LIT

HIGH KEY

45/45


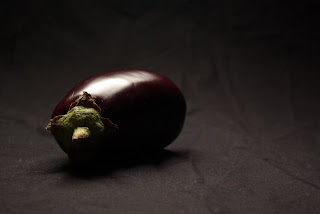
As you can see from the pictures above that some of the lighting is very similar i.e back lit and high key were both bright with similar shadows etc, and also low key is very dark. so i decided to to some research on the lighting techniques and then re-shoot the fruit i also decided to use a pear as on the low key shot the background and aubergine were quite hard to differentiate between.

DIGITAL DARKROOM - grey balance, warm & cool

ASSIGNMENT BREIF

DIGITAL DARKROOM

  1. Demonstrate the action of importing, organising and naming files/folders in Lightroom or Aperture.

  2. Write a caption for a least 1 photograph in you Lightroom catalogue.

  3. Using the white balance slider in lightroom produce 1 cool 1 'grey balanced' and 1 warm version of one of your photographs

For parts 1 & 2 please see my lightroom catalogue.

part 3

1. original image

2. warm version

3. cool version

4. grey balanced


Tuesday, 20 October 2009

LIGHTING TECHNIQUES RESEARCH

For part of my assignment I've been asked to photograph a piece of fruit/veg in a series of lighting techniques, which are as follow:- HIGH KEY, LOW KEY, BACK LIGHT, TOP LIGHT, 45/45Degree.

i previously attempted to photograph the fruit but was advised that the pictures needed improving so i thought I'd research the lighting techniques and find out a little bit more about them and then try to convey the information I'd found in my pictures.

these pictures below are from one of my sessions in the studio practicing the techniques


HIGH KEY & LOW KEY LIGHTING

Both High Key images and Low Key images make an intensive use of contrast, but in a very different way. When approaching a shoot of a dramatic portrait, the decision of making it a High Key, Low Key or "just" a regular image has great impact about the mood that this picture will convey. While High Key images are considered happy and will show your subject as a tooth-paste poster; Low Key portraits are dramatic and convey a lot of atmosphere and tension.


When looking at a High Key picture, you will probably notice two things right away. The first thing is that the picture is bright. Yes - to create a high key image you need to set your exposure levels to high values. You will want to watch out, though not to over expose.
The other noticeable feature of High Key images is the lack of contrast. In addition for the tone being bright, you will notice that it is almost even across the scene. This is achieved by carefully setting the lighting of the picture. A third feature, that need closer attention to notice is the lack of shadows in the picture. The shadows cast by the model (or subject) are suppressed by lighting in the scene.


In Low Key images the tone is darker, and the controlling color is usually black. There will be lots of dark areas in the picture. It is very common for Low Key images to give special attention to contour lines, emphasizing them with highlights.
Low Key images are also notable for a great deal of contrast that they display. Most notable is the rim light. A light surrounding the subject illuminating only the contour of the shape. So the contrast is between dark shape and bright contour.

High Key, Low Key and mood - usually, High Key images are considered happy. They convey positive emotions, while Low Key images are darker and present drama or tension.


(all the above information including pictures were taken from http://www.diyphotography.net/lighting-high-key-and-low-key for more info and examples of high key and low key photography visit there website).

BACK LIGHT LIGHTING

Back light is a term that is used for two kinds of lighting in photography. Back light can also refer to background light as well as the light that is coming form the back of the subject. there will be times when you come across your subject completely merging into the background and there is no sense of distinction even though you keep the depth of field low.
if you wish to give a three dimensional appeal to your frame then you need to put a back light. A light that will either accentuate the background or a light coming from the back that will differentiate your subject form the surroundings.

If you see the image of the girl, you can see that a distinctive aura around her separates her from the green surroundings. This effect could not have been achieved simply by using a camera flash unit, rather it has been achieved by throwing a light from behind her. This effect has made her look more glamorous and also accentuated the sense of distance between her and the background.


Background lights are also called as back lights. These lights are preferably used to highlight the backgrounds in cases where backgrounds contain details. For instance if you see the picture on your right, the background has been lit properly to bring out the details. In this case again, the background has been distinguished from the subject but instead of throwing light on the subject, the background has been accentuated.


(information and pictures were taken from www........)


45 DEGREE LIGHTING(also known as Rembrandt lighting)


Rembrandt lighting is a lighting technique that is sometimes used in studio portrait photography. It can be achieved using one light and a reflector, or two lights, and is popular because it is capable of producing images which appear both natural and compelling with a minimum of equipment. Rembrandt lighting is characterised by an illuminated triangle under the eye of the subject, on the less illuminated side of the face. It is named for the Dutch painter Rembrandt, known for his use of light.


Normally, the key light is placed high and to one side at the front, and the fill light or a reflector is placed half-height and on the other side at the front, set to about half the power of the key light, with the subject, if facing at an angle to the camera, with the key light illuminating the far side of the face.
The key in Rembrandt lighting is creating the triangle or diamond shape of light underneath the eye. One side of the face is lit well from the main light source while the other side of the face uses the interaction of shadows and light, also known as chiaroscuro, to create this geometric form on the face.
The triangle should be no longer than the nose and no wider than the eye. Rembrandt lighting is a combination of short and butterfly lighting-and as such it is actually the eye closest to the camera (on the broad side of the face) that should have the triangle of light. The narrow side is illuminated. This technique may be achieved subtly or very dramatically by altering the distance between subject and lights and relative strengths of main and fill lights. It is a common photography technique.


some examples of Rembrandt's work


(above info taken from website: http://en.wikipedia.org/wiki/Rembrandt_lighting)
TOP LIGHTING
I couldn't find much information about top lighting but this is the little bit that i did come across...
Lighting which originates from directly overhead. This type of lighting tends to yield rather ugly shadows under a person’s eyes and nose in the case of portrait photography and so is not commonly used for portraiture. However it’s a good way to light reflective items and is very useful for product photography.